

The purpose of this guide is to help you configure your Okta tenant to force users authenticate with Workspace ONE as an IdP. The benefit is that Workspace ONE Access can help you by blocking any unmanaged / non-complaint devices from accessing your business applications and without requiering the users to use passwords, so the user exprience is great.
Let’s Start…
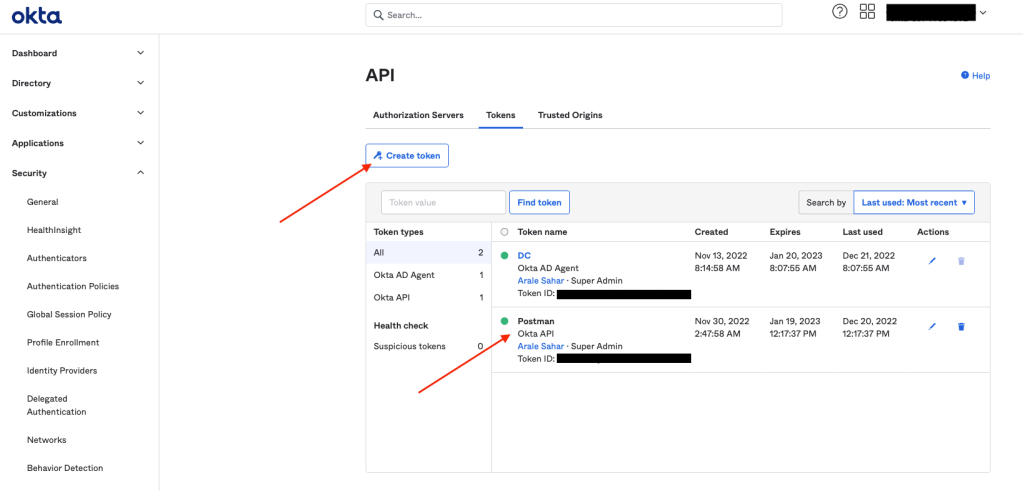
First Configure Postman for OKTA – this is detailed in the following link: https://support.okta.com/help/s/article/How-to-integrate-Postman-with-Okta?language=en_US
The API token can be easlily created as shown below:
Now, let’s get the Okta’s Postman “Policy” collection from here – https://developer.okta.com/docs/reference/postman-collections/?_ga=2.184197798.1267938135.1671563447-1453017792.1668341374
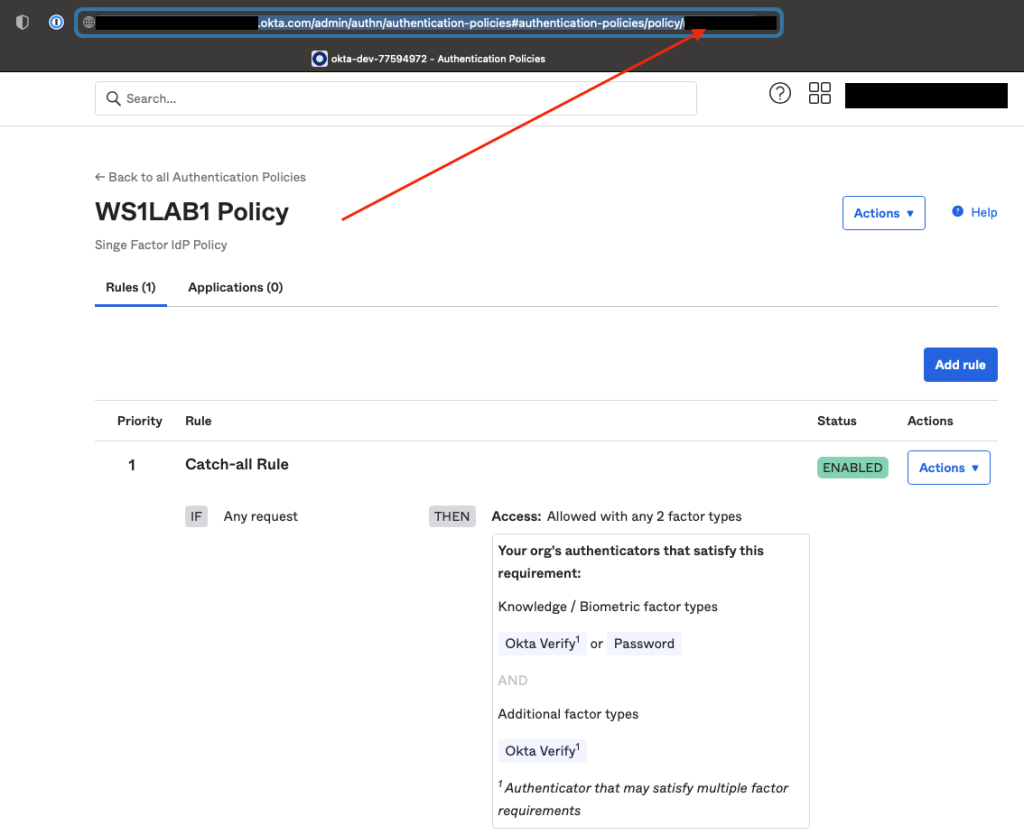
Login to your Okta’s admin dashboard and create a new policy. Grab the policy ID, this can be done easily by taking it out of the URL as shown in the second screenshot below.

Next, add a new rule under the policy you’ve just created, modify the rule according to your requierments. For the “User must authenticate with” option, choose “Any 1 factor type / IdP” as shown in the screenshot below:

Lauch Postman and create a new Environment, make sure to add your api key, your Okta’s URL and the Policy ID you’ve just created and finally click Save according to the screenshot below:

Now you also need to add the new Rule ID, this can be found by editing the rule and taking it out of the URL from the web browser (Like in step 1 for the policy) or by using the “Get Rules” API call as shown below. The result will provide you all the rules in that policy and their respective IDs.

Now, we need to look for the specific rule ID using the “Get Rule” API call as shown below. Get the rule and copy its contents to any JSON editor.

Copy the rule ID and add it in the environment section.

6. Now, let’s edit the JSON file.
In my example, I am editing the rule using Visual Studio Code, modify the content as shown in the second screenshot below. After you’ve made the necessary changes make sure to save the file as JSON.

After the modification, it should look like this:

    },
    "actions": {
        "appSignOn": {
            "access": "ALLOW",
            "verificationMethod": {
                "factorMode": "1FA",
                "type": "ASSURANCE",
                "reauthenticateIn": "PT2H",
                "constraints": [
                    {
                        "possession": {"methods": [
                            "idp"
                          ]}
                    }
                ]
            }
        }
    },
Let’s go back to Postman.
Duplicate the Get Rule API Call and give it a new name.
In the duplicated API call:
- Change GET to PUT.
- Under Body > binary > Select File – Choose the modified JSON file.
- Click Save and Send.

Now, let’s. go back to Okta’s admin dashboard, and refresh the Policy page, you should see that the rule is now updated as shown below.

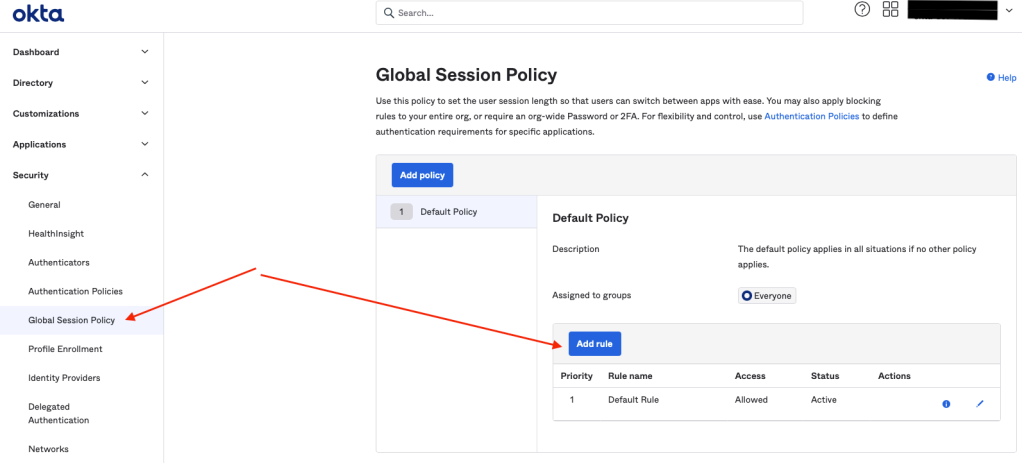
On Okta’s Global Session Policy, make sure to create a rule that allows “Any factor…” as showed below.

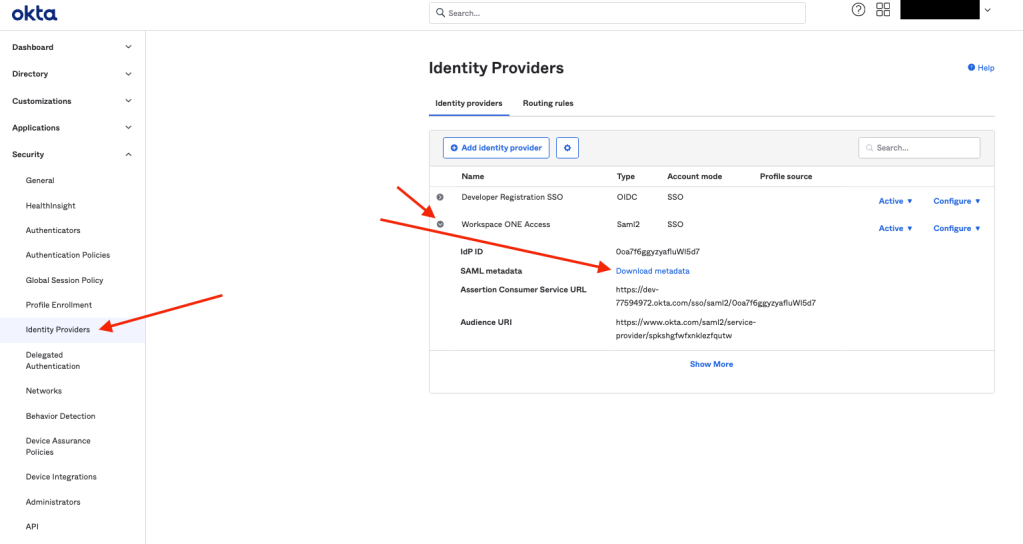
On Okta’s Identity Providers section, add a new SAML 2.0 IdP as shown below:


Add a new IdP Authenticator as shown below. You will need to provide the IdP metadate from your Workspace ONE Access tenant. The proecdure is documented here: https://docs.vmware.com/en/VMware-Workspace-ONE-Access/services/workspaceone_okta_integration/GUID-E254DA1D-CF29-4A9E-B0B3-5E48CD00B651.html


Download the metadata from Okta as shown below, then add it in Workspace ONE Access as a new web application as explained here: https://docs.vmware.com/en/VMware-Workspace-ONE-Access/services/ws1-access-resources/GUID-75DFD2D5-A028-4003-B2A6-1BEE44289690.html
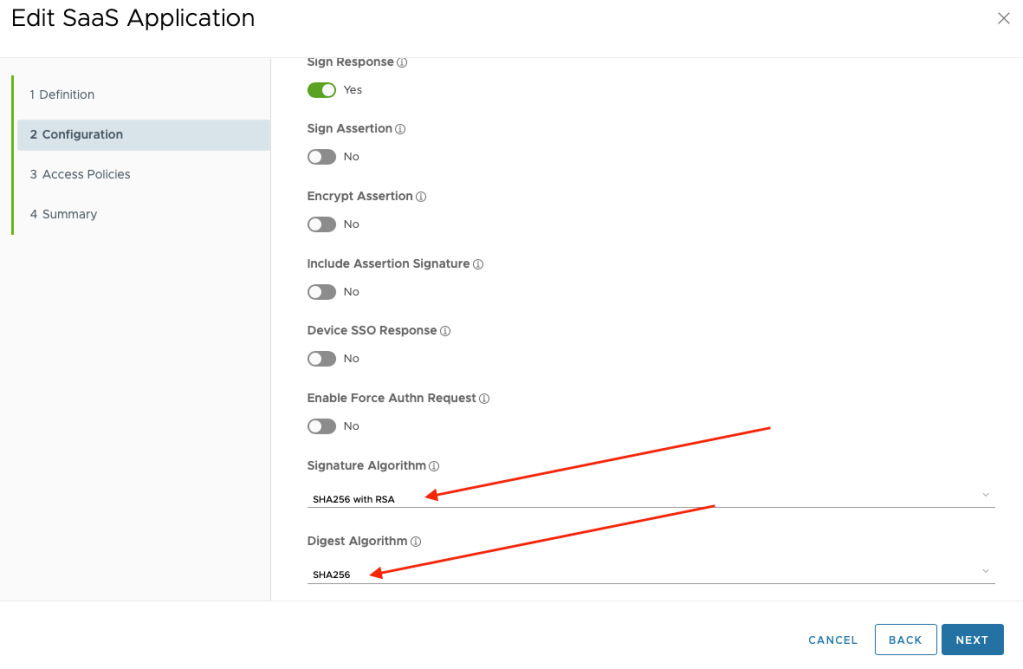
On Workspace ONE Access, edit the new app and make sure to change the “Signature Algorithm” and “Digest Algorithm” as shown below:
Keep in mind that you will need to assign users to this app in Workspace ONE Access and configure the required policies like Android Mobile SSO considering that you want to go passwordless.
This is documented here:
- iOS Mobile SSO – https://docs.vmware.com/en/VMware-Workspace-ONE-Access/services/WS1-Access-deploymentguide/GUID-3EC86F69-6F6E-4C48-A5D9-F319562B6B9C.html
- Android Mobile SSO – https://docs.vmware.com/en/VMware-Workspace-ONE/services/WS1_android_sso_config/GUID-3D7A6C83-9644-42AE-94BD-003EAF3718CD.html#:~:text=Mobile%20single%20sign%2Don%20(SSO,apps%20without%20reentering%20a%20password.

One response to “How to configure OKTA Identity Engine with Workspace ONE Access as an IdP Authenticator”
[…] Arale Sahar: How to configure OKTA Identity Engine with Workspace ONE Access as an IdP Authenticator […]
LikeLike